In May 1917, the French Army on the Western Front mutinied after the collapse of yet another ill-conceived offensive and the British Expeditionary Force assumed the main burden of the fighting. Its commander-in-chief, Field Marshal Sir Douglas Haig, had long wanted to advance from the Salient that the BEF held around Ypres, the town in Belgian Flanders that stood as a symbol of British sacrifice and defiance. The BEF had already twice saved it from the Germans.
Now Haig had his opportunity. After the Messines Ridge was seized in June to secure the main approaches to the Salient, the offensive began on 31 July. The Third Battle of Ypres—more commonly called Passchendaele after the village where it ended—came to epitomise the horrors of the Western Front, even though some stunning successes were achieved. Used as an offensive spearhead for the first time, the Australians experienced both extremes.
Enjoying commanding views from the low ridge that curved around the southern side of the Salient to Passchendaele, the Germans saw what was coming and employed an ‘elastic defence’ to meet it. The British would not be faced by strong frontline trenches, through which their more powerful artillery could blast a path. Instead, they would have to cross a series of defensive zones packed with pillboxes and machine-gun posts, becoming weaker the further they went. When they were sufficiently weakened, heavy counterattacks would destroy them.
The British played right into the Germans’ hands. Haig gave the main role to the Fifth Army, commanded by General Sir Hubert Gough, a ‘thruster’ whose impetuosity had cost the Australians dearly on the Somme in 1916. Gough ordered a first-day advance of 4 kilometres, which experience in previous offensives suggested was wildly optimistic.
Worse still, the battlefield had become a swamp. The British artillery fired three million shells during the preparatory bombardment, destroying the intricate drainage system and leaving unseasonably drenching rains with no means of run-off. Attacks wallowed in the morass. At the end of August 1917, with the Fifth Army barely past the foot of the all-important ridge, Haig gave the job of taking it to General Sir Hubert Plumer’s Second Army, to which the Australian divisions belonged.
Plumer fell back on the concept of the limited attack that he had used at Messines. Called ‘bite and hold’, it negated the Germans’ defensive tactics by halting the assault before resistance stiffened, and utilised the British material superiority through a dense ‘creeping’ barrage that moved ahead of the assault and a standing barrage to keep counterattacks at bay after it. Four such attacks, each covering about a kilometre and spaced at least six days apart to allow the artillery to move up, should result in Passchendaele’s capture.
As the Australians had the central role, the planning for the first attack, on the Menin Road on 20 September, was left largely to Major General Brudenell White, chief of staff of I ANZAC Corps. White wanted the 1st and 2nd Australian Divisions to advance in three phases, each with fresh troops and each shorter than the one before to allow for progressively greater difficulties. The rest of the Second Army and the Fifth Army would attack either side of the Australians.
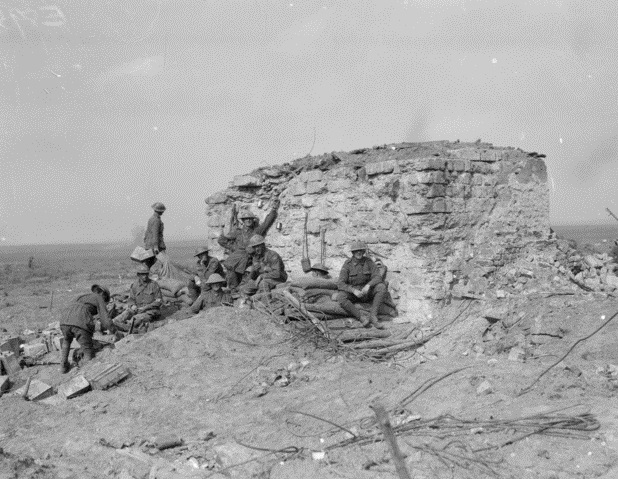
Blessed by good weather, which dried out the ridge, and a barrage that left most of the Germans dazed, the advance was flawless and put the Australians squarely on the ridge. The standing barrage shattered the German counterattack. For the first time, Australian divisions had assaulted side by side, giving a boost to morale that was judged to have increased their effectiveness by a third.
The barrage for the attack on 26 September was ‘the most perfect that ever protected Australian troops’, wrote Australian official historian Charles Bean. Moving behind it and using the same tactics as before, the 4th and 5th Divisions from I ANZAC advanced 1.2 kilometres along the ridge to gain Polygon Wood.
Hard fighting was still necessary. Striking pre-emptively, the Germans drove back part of the British 50th Division next to the 15th Australian Brigade, which ended up having to take the British objective as well as its own. ‘You men have done very well here’, a British general told the Australians, one of whom shot back, ‘Only as well as ability and opportunity allow’. The general replied, ‘Very well put young man, very well put indeed, but you have undoubtedly the best troops in the world’.
As their ‘elastic defence’ had now been foiled twice, the Germans reverted to holding their forward position in strength and counterattacking from it. The change was in place before the assault on 4 October, in the centre of which the 3rd Australian Division and the New Zealand Division from II ANZAC advanced next to the 1st and 2nd Australian Divisions from I ANZAC. Stepping off, they saw the Germans, who sought to regain lost ground, coming towards them. The Germans were swept aside and the assault continued 1.5 kilometres to Broodseinde.
For the Germans, the ‘black day’ of Broodseinde proved that they had no sure way of countering the British advance. For the British, Broodseinde was one of the most important victories to date. Passchendaele beckoned.
 Print This Post